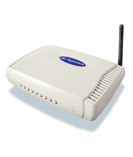
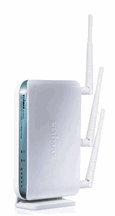
 The Rotal / Siemans RTA 1025W. Bezeq's standard Wireless Modem / Router 802.11 b/g
I have recently been playing around with various Wireless Modems and Wireless enabled devices and thought I'd share with you some tips to increase your Wireless service speed and reliability.
1. Enable Wireless security. It is a real scandal that Bezeq issue their Modems with security disabled allowing any Tom Dick and Harry to use your Wireless connection and ergo, use your Internet connection for free. If you have enabled file sharing within your Network then this gives the gatecrasher access to all your files as well! It goes without saying that allowing others to use your Wireless device slows the service down for you! Recently I had to set up a new British Telecom Modem/Router for a family member in England. I was very impressed with the setup which forced you to enter a secure administrator user/password for the modem and set a password for the Wireless. Bezeq, are you listening?
2. Location Location Location. The location of your Modem is vitally important for your Wireless reception quality. Think about where your Wireless clients, ie your laptops will be most of the time and then place your Modem / Router in a central place where the signal will have to pass through as little obstacles as possible. Avoid thick walls at all costs. Obviously the placement of your Modem / Router is limited to where you have a Bezeq socket and electric mains outlet. It is also important to have one computer (usually the desktop) connected to the Modem Router via standard Network cable (otherwise when the wireless network is down for whatever reason you will have no way to access the Modem console). This will also limit the placement options of your Modem / Router. Don't use more than 15 metres of Network or telephone cable. No less important is the fact that no one (unless you are a complete geek) wants cable running all over their home. In England where they have floor boards you could hide the cable under there. In Israel we have to run it around walls. I apreciate that all these conditions make it difficult so much thought has to be done at this stage.
3. Change your wireless channel. The chances are that you'll have quite a few of the same standard Bezeq Modems within Wireless range of your wireless devices from neighbours in your surrounding area. If they are neighbours living above or below you, depending on where you have placed your Modem /Router, sometimes their Wireless signal might even be stronger than yours. All Wireless Routers transmit at a specific channel number and obviously if everyone is using the default Bezeq settings then everything will be using Channel 1.
Go into the Modem console and find the Wireless TAB. Change the channel option from default channel 1 to something else. Working on a unique channel frequency will certainly improve reception as Modems running on the same channel will cause interference.
4. Disable TCP / IP v6. Windows VISTA comes with two TCP/IP version standards enabled by default with Wireless device properties. It is worth disabling the TCP/IP v6 standard as it is not in use and makes IP address, default gateway and DNS recognition easier and quicker and more reliable. Those with Windows XP only have v4 so don't worry about this step.
5. Set up static IP addresses. Setting Static IP addresses for all of your Network devices certainly speeds up connection time and makes the line more reliable. If your laptop is only ever used with the same Wireless service then it is definitely worth doing. However if you take your laptop to work / school or travel a lot then it's not worth it unless you remember to delete the Static settings before you travel every time. Go into the Details button on the Wireless properties (Windows XP) or show details within the Network Sharing page (Windows VISTA / Windows 7) and write down the current IP address of your Laptop, default Gateway, Subnet Mask and 1st and 2nd DNS addresses. Next go into Properties of your Wireless device and highlight the TCP /IP v4 line. Click on Modify button and enter a static the IP address as the one which the Laptop is currently using. Next the Subnet Mask and the default Gateway. The next frame shows the DNS servers. This must be set to the two DNS addresses you have written down. Note: failure to set these fields correctly will result in a connection to the local network but no Internet connection.
Note: Make sure that all your devices are set to a unique IP address. Failure to do this will result in an IP address conflict. Another thing. make sure that your Modem / Router's Dynamic address assignment is large enough for all your devices. Typically this would be 10.0.0.1 to 10.0.0.10, that is up to 10 devices. If you have more devices then increase this range.
6. Switch off Wireless roaming – looking for Wireless Services. The Wireless receiver will continue to search for services within range in order to update its Services list. The Service constantly uses your connection and slows it down. If you only ever connect to one Service then this Windows Service should be switched off. The Windows Service is called " Wireless Zero Configuration". Note: The Service obviously has to be switched on for initial detection of the Wireless Service. Once the Laptop has connected and entered this service in its table as "Connect to this Service Automatically" then the roaming service can be switched off.
7. Stop all unused Network applications from running. Disable all the printer / Webcam / Adobe update processes from running on Startup. These processes, as well as taking up valuable CPU time and memory, so slowing your Laptop down, they also are constantly "calling home" over the Internet to check for updates. (WinPatrol is excellent for this task). Similarly, exit from any unused VOIP apps like Skype / MSN messenger or VoipStunt which take up a lot of bandwidth.
8. Applications running on the same physical disk drive. If you are using your Local Network for file sharing, that is, frequently copying files or updating files or playing video or music files from somewhere on your Network, then you should check what other applications are using the same physical disk drive as the one you wish to access. Any application that is constantly accesing the disk drive should be configured to use another drive. For instance, if you are running a P2P tool which is constantly reading and writing to a disk drive then this should be configured to use a different physical drive (not just another partition on the same drive) to the one you wish to use over the Network. Failure to do this might result in your application freezing (such as the movie you are watching) while it waits for the drive to give it resource time.
All the above suggestions will cost you nothing. Now for some suggestions that will cost you.

9. Switch to 802.11n standard. If your wireless enabled device accepts 802.11n standard then it's definitely worth replacing your standard Bezeq modem/router (which only transmits at 802.11b/g standard) with a 802.11n Wireless router. You should see a dramatic speed increase. You have two options here. (1) You can keep your Bezeq Modem / Router as the device that connects to the Internet and add a new router which has 802.11n Wireless. You can connect all your computers / Network printers that use cable to this device, giving them common IP addresses. Your Wireless enabled devices will connect to the new router and recognise them. Expect to pay around NIS 350 for a descent 802.11n router (2) You can replace the Bezeq Modem entirely by buying a Modem / router. This way your Internet Connection, Network devices and Wireless connections will all be served by one Router. Expect topay around NIS 450 and up for this. Don't dismiss this option if your Laptop has no native 802.11n Wireless receiver. You can buy a USB 802.11n Wireless receiver for your laptop. Prices are around NIS 200 and going down all the time. Note that the USB receiver looks exactly like a DiskOnKey and so sticks out from the Laptop which is a pain. You don't usually keep a DiskOnKey plugged in all the time so this wouldn't usually be a problem. However you would want to keep the wireless adapter plugged in the whole time. This is inconvenient as you have to be very careful not to knock it out of place. The use of a 90 degree turn USB adapter might help. I've seen a mini USB adapter but never a full size one. Perhaps they exist? I don't know. Using a USB extension cable and placing the Wireless receiver at the back of the Laptop out of the way would certainly improve matters though.
Common Complaints with 802.11n routers
Trying to connect an old 802.11 b/g Wireless device to these routers often results in IP Address errors or Limited Service warnings. Despite the Routers claiming by default to be able to connect to all 802.11 standards I have encountered two router models that were set to connect to 802.11 b/g/n devices but only worked with 802.11 n devices. When switched to transmit only to 802.11 b/g devices then the problem is resolved. However this means that your 802.11n Wireless enabled device will run at the old g standard which obviously negates the whole purpose of buying an 802.11n router doesn't it! In other words, if you only wish to use 802.11 b/g devices then you may as well stick to your Bezeq Modem.


